
Mastering free motion quilting
Free motion quilting is both fun and rewarding. Whether your machine is equipped with robotics or is purely hand-guided, free motion quilting is a valuable skill for any longarm quilter to achieve. Yet, it can be challenging and many find it a daunting skill to master. If you’re looking for free motion practice ideas and inspiration, read on.
What is free motion quilting?
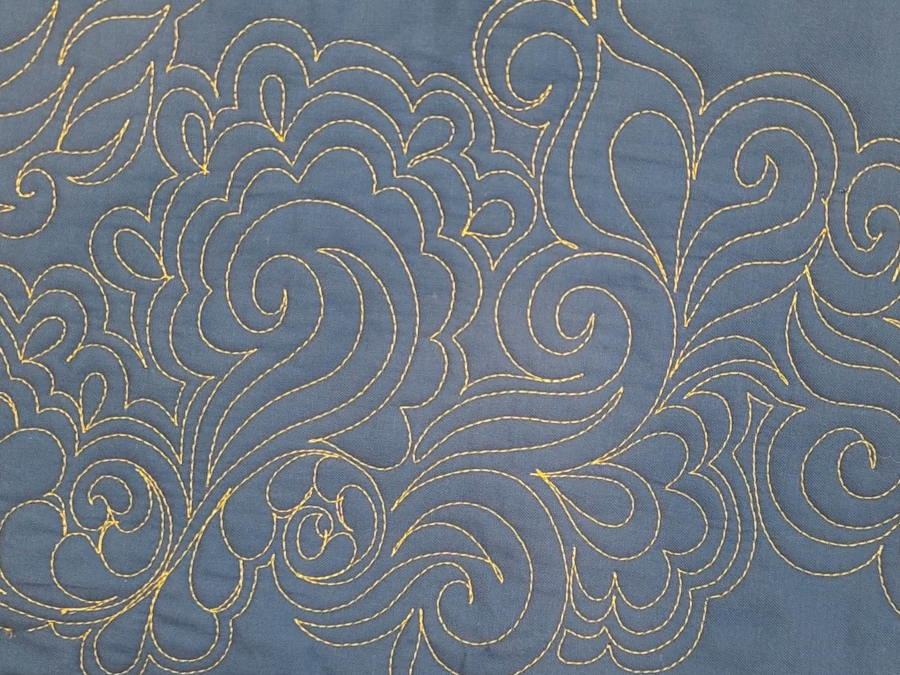
Often called hand-guided or non-computerized quilting, free motion quilting is the art of stitching together layers of a quilt (backing, batting and top) by moving the machine head around the quilting frame manually. Often, a stitch regulator is employed to create even stitches despite the speed of movement. However, the direction of stitching, the size and shape of the quilting designs, is entirely based on how and where the quilter moves the machine across the quilt top.
Why free motion quilt?
Even computerized quilters can benefit from employing free motion skills from time to time. There are many reasons to learn and practice free motion quilting techniques.
- Familiarity with your machine: Free motion quilting helps you stay in tune with your machine. It gives you the opportunity to evaluate how it moves across the quilt and see the quality of the stitches. If any issues are identified, they can be remedied.
- Quilt from the front: Instead of staying behind the machine to stitch pantographs, quilting free motion all-over designs allows you to move to the front of the machine where you can see the quilt and stitches as you progress.
- Quick basting: Free motion basting stitches are easy and precise.
- Stitch in the ditch: Stitch in the ditch (SID) is essential to many custom quilt projects. Stitch in the ditch with a ruler or free motion is generally faster and potentially more accurate than computerized ditch work.
- Background fillers: Any computerized longarmer will tell you that background fills are the one of the most difficult tasks to accomplish with a computer. Free motion quilting results in easy and eye-catching fillers for small spaces and odd shapes.
Tips for success
- Practice, practice, practice!
- Practice on real quilts: Practicing on real quilts results in useful skills. If you practice on scrap fabric instead, use quality materials. When you’re finished with the practice project, you’ll have something worth keeping.
- Try something new: Break out of your comfort zone and occasionally try a new design or quilting style. Even proficient free motion quilters can expand their repertoire by learning a new design.
- Try different sizes: Stitching a design, even a familiar one, in a larger or smaller size, can result in a new and unique look.
- Take classes: Karen McTavish and Claudia Pfeil are just a few of the many talented and award-winning educator artists to consider taking instruction from.
- Stay positive: Don’t compare yourself to anyone else. Strive for improvement and celebrate any advance in skill. Never be so hard on yourself that it discourages you from trying and growing.
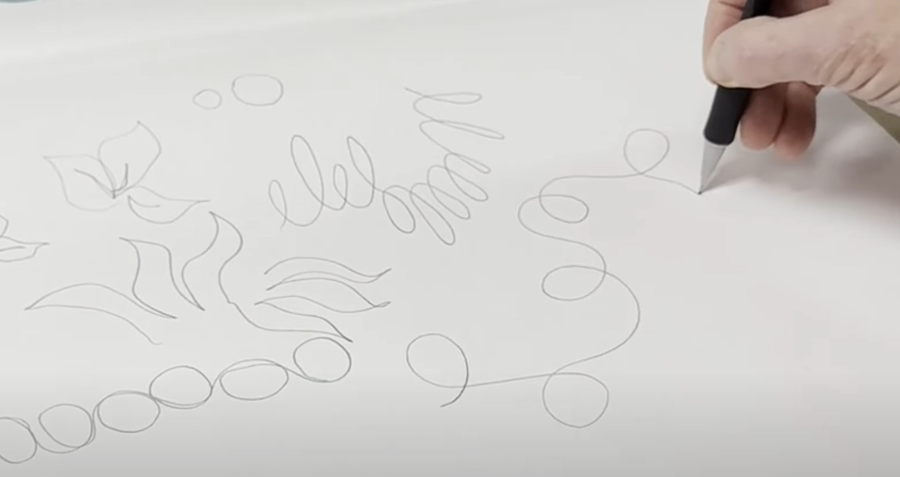
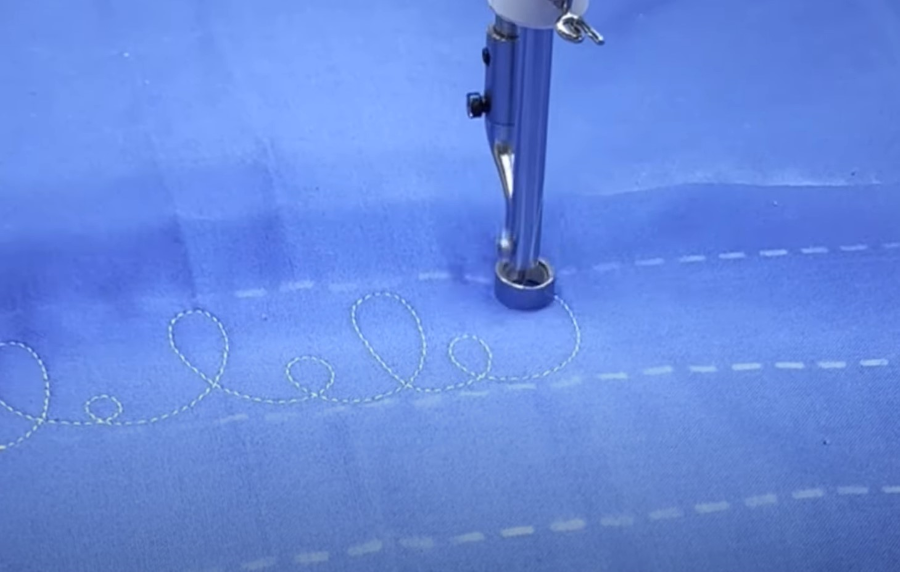
What to practice
If you’re ready to try free motion quilting or looking to brush up on your basics, here are a few shapes to get you started.
- Arcs
- Loops
- Pearls
- Lines
- Feathers
Click here to watch a video tutorial by Myrna Ficken showing how you can practice several basic free motion quilting shapes on paper as well as on fabric.
Additional Resources
For more free motion design inspiration, check out these video tutorials featuring Lauren Jackson.
Quilting Oyster Clusters on a longarm quilting machine
Quilting the Oyster Rope border filler on a longarm quilting machine
Quilting the Twisted Leaf grid filler on a longarm quilting machine
Quilting the Twisted Leaf border variation on a longarm quilting machine
Quilting the Electric Grid filler design on a longarm quilting machine
Quilting the Electric Grid border design on a longarm quilting machine
Looking for even MORE ideas? Follow this link to our blog article featuring an array of free motion design ideas for your next project.
15 creative designs for your next quilt